


5’x8’x5’4” Large Outdoor Underground Tornado Shelter for 8 -10 People
$6,899.00
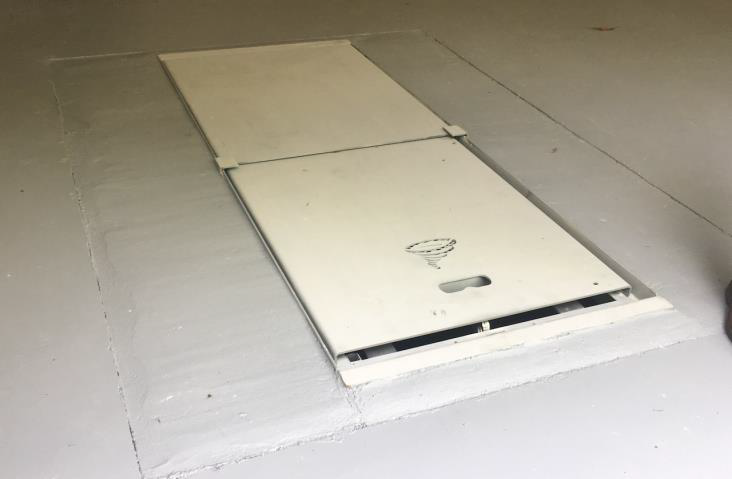
It has room for up to 8-10 people. Easy to install in your backyard, patio, or garden. It comes with removable and adjustable shelves to store water, medicines, food supplies, and whatever you need inside the shelter.
Financing available.
New Features!
First Feature -Hybrid Shelter
Since the onset of 2022, Torshel has been installing these shelters with an optional 6′ x 8′ x 6″ thick extended slab. This way, the client can install a 4×6 above-ground safe room, a small shed, or an outdoor coffee table later on. In addition, some clients buy an in-ground unit but later decide to include an above-ground shelter for their neighbors, the elderly, or someone who has claustrophobia or finds it hard to use the inground version.
Second Feature -Carport Concrete Slab and Storm Shelter
For an additional fee, we can make a two-in-one investment. While we install your shelter, we can extend the concrete slab to a 10’ x 20’ x 4”, so you can use the remaining space of concrete slab for a bigger shed, carport, or whatever you want. The shelter will be installed in a corner, enclosed with the entire concrete slab.
Third -Renders
Send us some good-quality pictures of the job site, and our Product Development teammates will prepare some renders so you can have a clear idea of what the final product will look like.
It comes with an emergency exit using a hydraulic jack if something blocks the hatch (door). Torshe’ls Newest and High Technology Feature!
Contact us for an installation or shipping quote.
Product Specifications
- Capacity for 8-10 people
- Steel construction
- 5’ L x 8’ W x 5'4″ H, 40 SF
- Exceeds FEMA 320, 361, and ICC 500 protocols
- Rated for EF5 tornadoes with 250 MPH winds
- 10 GA walls and 3/16″ steel plate door
- Easy lifting door design
- 27” W by 36” door opening, located 12” H above the ground level, preventing water coming in during rains.
- 13” by 13” bullet resistant window made of 1.5” polycarbonate
- Rust-resistant coating
- Commercial grade weatherproofing
- Coal Tar Epoxy coating to prevent corrosion
- Aluminum ladder or Carpeted wood built-in steps and seating, removable stairs to make extra room
- 2 adjustable shelves
- Key deadbolt lock on the door, easy to open from the inside
- Removable handrail
- 2 air intakes built-in ventilation
- 2 battery-powered fans (batteries not included)
- 2 battery-powered LED lights (batteries not included)
- 3-ton hydraulic jack
- Powder coated interior
- Shelter weights around 2,000 lb
- Designed and made in the USA
Price
$6,899 shelter only.
Inground Outdoor Manual
Please make sure that you read this manual carefully before proceeding with the installation.
Before the Concrete Slab is Poured
Tools and materials needed:
A. A mini excavator:
Medium and Large shelters: John Deere 35, Bobcat 35 or similar.
The shelter weighs around 2,000 lb
Jumbo, 3,500 lb: Bobcat 42,45 or 50, Deere 50 or similar
B. 3,000 PSI concrete pea gravel ready mix; five (5) cubic yards for
the
medium and large, and 6 for the jumbo.
C. Concrete vibrator
D. Half inch rebar, 6 to 10 pieces, 10’ long
E. 8’ 5,000 lb. chain with hooks
F. 6 heavy-duty soil steel stakes
G. 40’ heavy-duty rope, cables, or straps. We recommend 5,000 lb. straps; in case of movement, it allows
you to adjust them
H. Other common construction tools
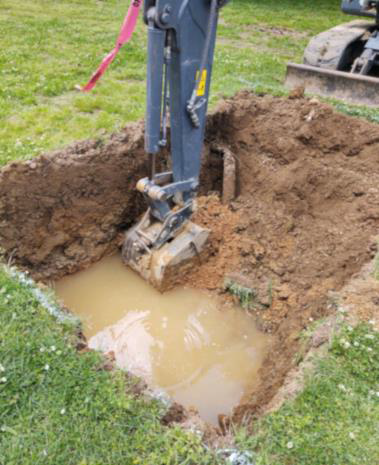
Install your shelter during the non-rainy season. Do not install shelters in areas with high water tables.
Disclaimer: Always use the correct tools, and proper safety methods. Torshel shall not be held liable for any errors, omissions or for damages or injuries of any kind.
Note: An experienced contractor must conduct the installation.
Note: An experienced contractor must conduct the installation.
1. The contractor will measure and mark the desired location. Then, with the aid of a mini excavator, proceed to dig a rectangle hole. For instance, if your shelter is 5’W x 7’ L x 5’4” H, the pit must be 6’W x 8’ L x 5’5”.
2. You can have the unit flush with the concrete level, or 1” above the ground. Note that having it 1” or more above the concrete will prevent water from getting inside the unit in case of an accident.
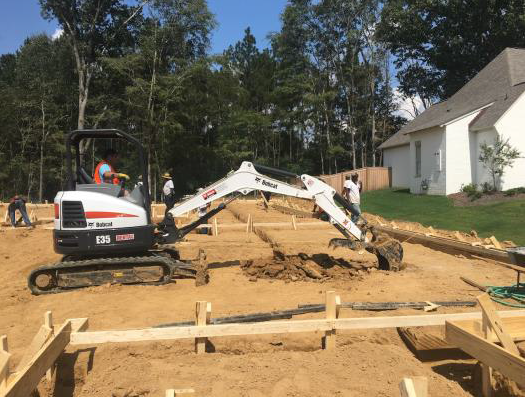
3. The pit must be perfectly square and leveled; otherwise, the shelter will not be leveled.
4. Measure the height of the shelter and the height of the hole one more time. Again, make sure that you have the correct dimensions; otherwise, you will need to repeat step # 8.
5. Put one small concrete block on each corner of the hole and make sure they are leveled. The shelter will be placed on top of them; this will leave about 4” to 6” gap.
6. Make sure there is space on the bottom for the concrete to penetrate
underneath the unit.
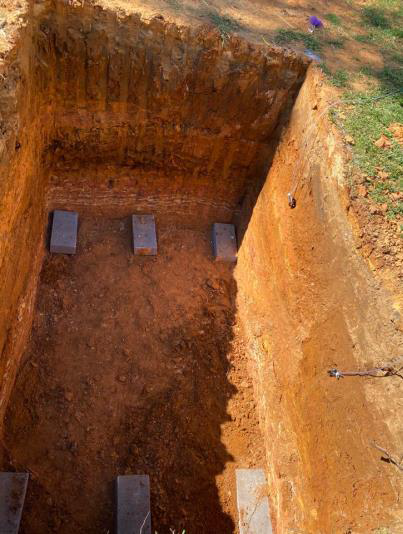
7. Install 6 heavy-duty stakes horizontally on the bottom of the long walls, 3 per side.
8. Cover the bottom and walls of the pit with heavy-duty plastic, use the tape to secure the entire hole, and prevent water from entering. Make small holes so the stakes can be exposed and then covered surrounding with tape.
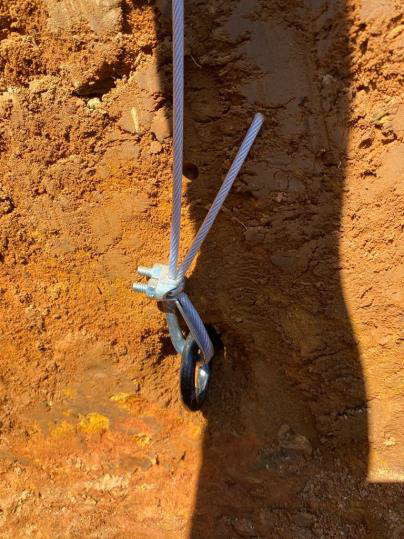
9. Attach heavy-duty cables or a strap and leave it on the side. Once you place the shelter inside the hole, these cables will secure the
shelter in place and when you pour the concrete into the pit, the shelter will not float. Install a minimum of 3 holding cables for the medium and large units, 4 for the jumbo.
10. Using the heavy-duty chain, lift the shelter using the excavator. Make sure that the chain is secured to prevent any accidents.
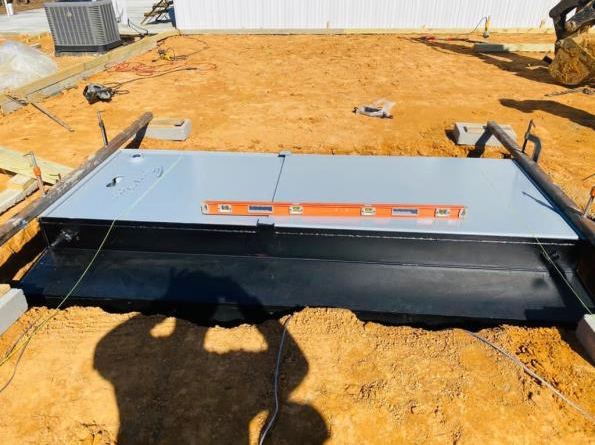
11. Slowly lower the shelter and fit into place, making sure the unit is leveled, flush or 1” above the future concrete slab level.
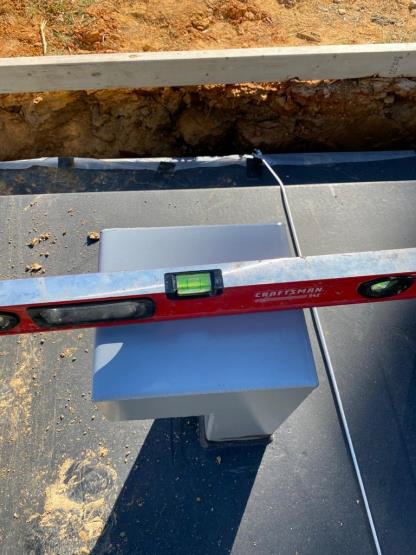
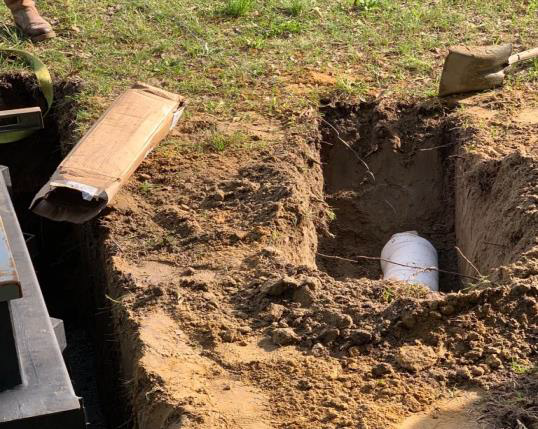
12. Once in place and leveled, install the magnesium anode; buried it outside of the future concrete slab, preferable in the yard area. Make a small hole, maybe 12” in-ground and place it there; then attach the anode cable to the unit, preferable to one of the exterior side wall hooks of the unit; scratch the epoxy cover a little bit, so the cable touches the metal, this way the rust preventing chemical reaction can occur. Installing the anode separately from the slab allows the homeowner its replacement every 5-10 years or so. Mark the area where the anode is located for future reference.
13. Add about 2 gallons of water to the anode and cover it with dirt. This will start the reaction, and the sacrificial anode will do its job.
14. Install a “Do not remove the plastic” sign on top of the shelter.
15. Cover the shelter with 2 layers of plastic; this will prevent rainwater or any liquids from getting inside during the construction the plastic will be removed once the house is ready to be moved in.
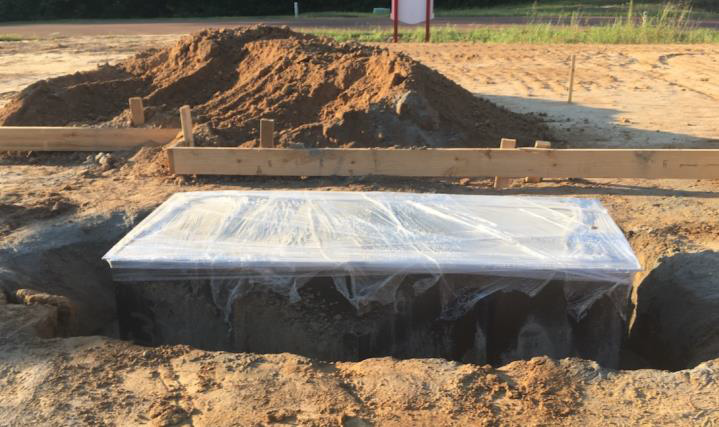
16. With the shelter in place, tie it down using the cables or straps; cover the sharp corners of the shelter so that they won’t damage the rope or cables. Ensure that they are secured and very tight; otherwise, the concrete going underneath the shelter will create a lot of pressure and push it up. If this step is not done properly, the shelter will float, and it will be a disaster (like this picture).
17. At this point, you are ready to pour concrete. First, make sure that the cables are well tightened and secure. Next, ask the truck operator to pour the concrete thin (wet) to penetrate underneath the shelter.
18. Start on one side, and then go to the opposite side. Use the concrete vibrator to make sure that the concrete reaches all the spots.
19. Get inside the shelter, use a rubber hammer, and hit the floor to make sure the concrete is filling the shelter’s bottom.
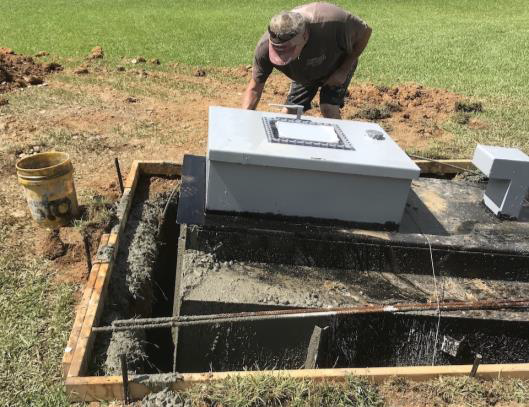
20. Go slowly on one side, like if you were looking at a clock, go to 12, then to 6, then to 3, then to 9. You need to pour a little bit of concrete on one side, then go to the opposite side, and so on, always making sure that the shelter does not move. If you pour one side only, the concrete will force the unit, and it will be tough to square and level it again.
21. Go around the unit, pouring concrete and vibrating it until you reach a level like shown in the picture.
22. Do not fulfill completely; leave the upper 4-5″ free, the concrete slab will be poured soon, and lock the shelter with the entire slab.
23. Let it cure for 2-5 days. If the stakes were correctly installed, they will hold the unit until the concrete cures. The rope or cable will be left inside the concrete, and the rest can be cut after 30 days.
24. The company in charge of the concrete slab should later complete filling the remaining unfilled area with concrete. Contact this company and make sure that they do not remove the plastic before pouring the slab.
25. The homebuilder or homeowner needs to be present during the pouring day. Ask the concrete crew to do the best finishing job. They need to pour a little bit of concrete on one side, then go to the opposite side, and so on, always making sure that they do not move the shelter. If they pour one side only, the concrete will force the unit, and it will be almost impossible to square and level it again.
26. Once the shelter is installed correctly, we recommend removing the plastic when the
house is ready to be moved in; using a knife, cut the plastic slowly; if everything was done properly, the unit should be clean and ready to be used.
27. By using this method, the in-ground shelter will be anchored with the entire foundation.
28. If you have any questions, please contact us ahead of time. We can do some training by Skype or phone call. info@torshel.com
HOW DO I GET IT?
A) Pick it up You can pick up your shelter at one of our warehouses located in Jackson, MS, or Nixa, Springfield, just as many clients and contractors do. You will need to bring a flatbed truck or a suitable trailer and a truck to haul it; you or your contractor can install it following Torshel’s guidelines.
B) Delivery and installation service For an extra and affordable fee, we can bring this shelter and professionally install it at your current house or new construction. We send out our team of installers to the following states: Texas, Louisiana, Arkansas, Mississippi, Alabama, Tennessee, Georgia, and Florida. Ask your family, neighbors, and friends, in case they would like to acquire a safe room also. We can discuss a special discount depending on the size of the shelters and the distance from each other. Contact us for delivery and a professional installation quote.
C) Shipping For DIY and clients that live far from our installation service areas. We can ship the safe room anywhere in the United States. Fill out the form and we will get back to you with a quote within 24 hours. The delivery site must be accessible for a box truck lift gate, as shown in the image.
Average arrival time: 5-10 business days.
Average shipping cost: $399 to $1,500 depending on your location.
If you would like a storm shelter but do not have the financial resources, you can apply for financing; it is very easy, and it takes less than 5 min. www.torshel.com/financing


